A 301 Permanent Redirect permanently redirects one URL to another. You set up a 301 redirect using .htaccess to send visitors to a new URL and tell search engines that a page has moved so that the new page can be properly indexed.
Some common uses of a 301 redirect with .htaccess are:
- After moving to a new domain, you can use a 301 redirect on the old domain to send visitors to the new site.
- After moving old site pages to a new site structure, you can use 301 redirects to send users to the new pages.
- After combining two sites, you can use 301 redirects to ensure visitors go to the new pages.
On HostPapa sites, use .htaccess files to create and manage redirects. You can create a .htaccess file by using the File Manager in cPanel or using FTP to upload a .htaccess file you created with a text editor on your computer.
Note: A .htaccess file is a hidden file, so you’ll need to configure the cPanel File Manager or FTP client to see hidden files on your system. Follow the instructions below to learn how.
Developer tip: If the site doesn’t work after updating or adding the .htaccess file, restore site functionality by either renaming or removing the file.
Code to redirect to a page
Place the following line into your .htaccess file (repeat for every page you want to redirect).
RedirectPermanent https://www.domain.com/old-file.html https://www.domain.com/new-file.html
Code to redirect to a new domain
Place the following line into your .htaccess file:
RedirectPermanent / https://www.new-domain.com/
How to implement a .htaccess file using the cPanel File Manager
The cPanel File Manager provides an easy way to create or access a .htaccess file. Here’s how:
-
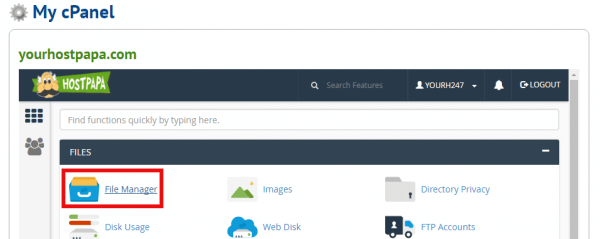
- Go to your HostPapa cPanel.
- In the Files section of the cPanel, click File Manager.
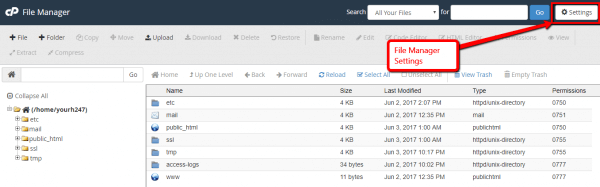
- The File Manager opens in a new tab. Click the Settings button at the top right.
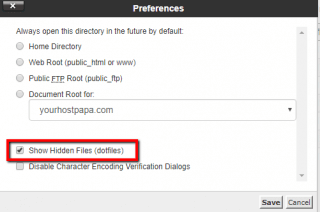
- In the Preferences window, check the Show Hidden Files checkbox. Click the Save button.
- The File Manager window now shows all files, including hidden ones. In the Files panel, double-click the public_html item.

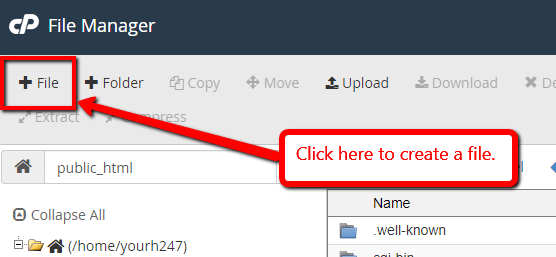
- The contents of the public_html folder now display. This is where your .htaccess file will live. There isn’t a .htaccess file yet, so you’ll need to create it for a new site.
- Click the +File button at the top left.
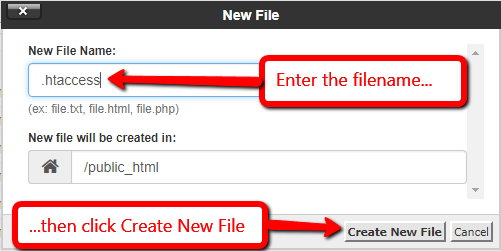
- In the New File window, enter .htaccess as the filename.
- Click Create New File.
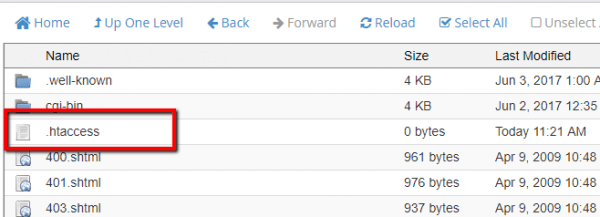
- The .htaccess file appears in the list.
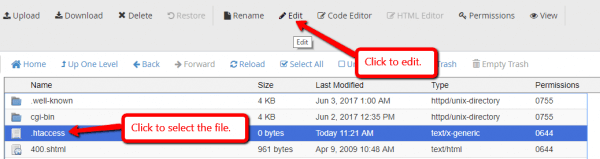
- Click once on the .htaccess file to select it, then click Edit.
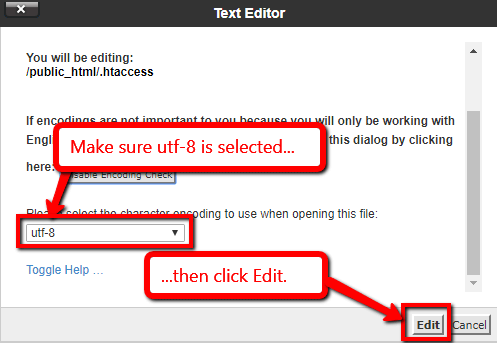
- In the Text Editor dialogue box, scroll down and make sure utf-8 is selected.
- Click the Edit button.
- The text editor opens in a new tab. The window will be blank as it’s a new file. Enter the page or domain name redirect code as described above.
- When you’re done editing the .htaccess file, click the Save Changes button at the top right of the Text Editor window.

- You can now close the Text Editor tab.
How to implement a .htaccess file using FTP
To implement a .htaccess file using FTP:
- Create the .htaccess file on your computer using a text editor.
- Add the page or domain redirect code as described at the beginning of this article.
- Use your FTP client to access your site. Make sure to set your FTP client to view hidden files.
- Go to the public_html directory.
- Upload your new .htaccess file to the public_html directory.
- When the upload is complete, exit your FTP client.
If you need help with your HostPapa account, please open a support ticket from your dashboard.
