WordPress Toolkit is a management interface that allows you to install, configure, and manage WordPress in Plesk easily. In this article, we’ll show you how to clone a WordPress website in Plesk. Start out by accessing your Plesk control panel through your HostPapa Dashboard.
Please note that WordPress Toolkit can install, configure, and manage WordPress version 4.9 and later, and the extension is free with the Web Pro and Web Host Plesk editions. It’s available for a fee for the Web Admin edition.
How to clone a WordPress website
To clone a WordPress website, you need to create a full website copy with all website files, database, and settings.
You might want to clone a WordPress website for one of the following reasons:
- You maintain a staging version of a WordPress website on a separate domain or subdomain, and you’d like to publish it to a production domain to make it publicly available.
- You have a publicly available WordPress website, and you want to create a staging copy of it to make changes without affecting the production website.
- You want to create a master copy of a WordPress website with preconfiguring settings, plugins, and themes and then clone it to start a new project for a client.
- You want to create multiple copies of a WordPress website and make different changes to each one.
To clone a WordPress website, follow these steps:
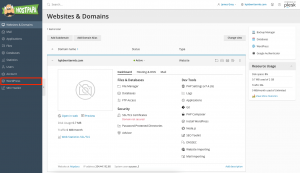
1. Go to WordPress.
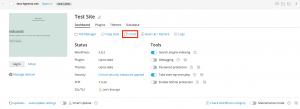
2. Click Clone on the card of the WordPress installation you’d like to clone.
3. Choose the target where you want to clone the website:
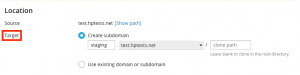
- Keep Create subdomain to have WordPress Toolkit create a new subdomain with the staging prefix (default). You can use it or type in the desired subdomain prefix.
- Select Use existing domain or subdomain, then select the desired domain or subdomain from the list.
Note: Ensure that an existing website is not currently using the domain or subdomain you select as the target. During cloning, website data on the target may be overwritten and lost.
4. If you’d like, you can change the name of the database automatically created during cloning.
5. When you’re happy with the selected target and database name, click Start.
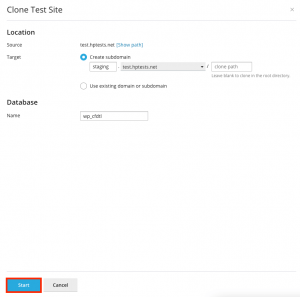
The new clone will be displayed in the WordPress installation list when the cloning is complete.
If you need help with Plesk, please open a support ticket from your dashboard.
